|
More Than Knots |
|
Tie a 3L4B Turk’s Head Knot (Flat method) |
|
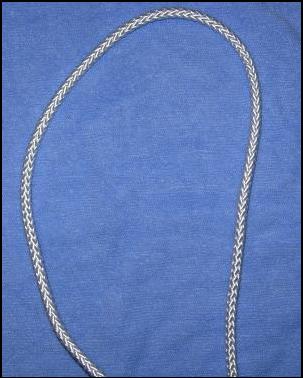
Step 1:
The first step is to take your cordage and make a bight (curve) about six inches in length. (I am right-handed, so the knot will be tied in a right handed pattern.)
Please go to step 2. |
|
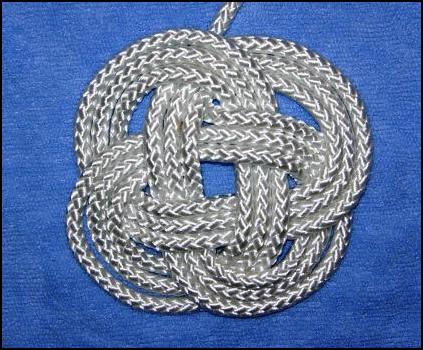
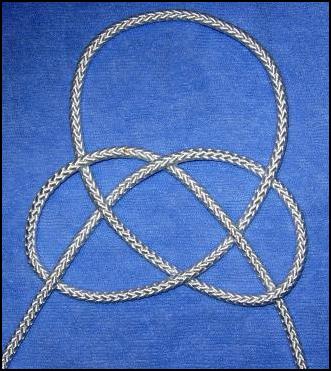
Shown at the left is the three Lead, four bight, (3L4B) Turk's-Head Knot done in a flat pattern. In this section you will learn to tie this knot using a Carrick Bend on-the-bight knot as a starter knot. You will also tie the 3L4B Turk's-Head knot around a cardboard cylinder or wooden dowel to show how it will look when tied in a more "normal" situation. (When the 3L4B Turk's-Head Knot is tied around a cylinder it is also known as the Boy Scout Woggle.)
Items needed: Flat table or surface cleared of obstructions. A cardboard tube or a large wooden dowell. One strand of cordage about six feet long. (For this illustration, I used 3/16" nylon cordage.) (To make a second or third knot, you will need additional strands of cordage at least six feet long.) |
|
There are several different methods of tying the 3L4B Turk's Head knot. I will show an alternate method for tying the 3L4B Turk’s head in another part of this web page. In this description, I will show the flat method using the Carrick Bend-on-the-bight knot as a starting knot.
Our goal is to tie a 3L4B Turk's-Head knot starting with the Carrick Bend-on-the-bight knot. After you have gone through the steps below, you will be able to tie the 3L4B Turk’s Head knot.
|
|
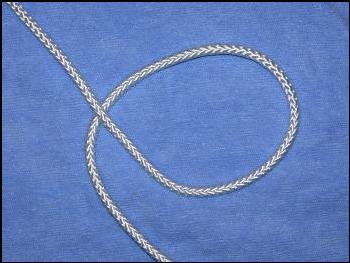
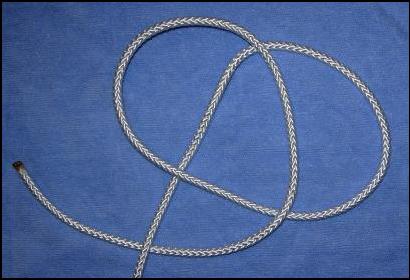
Step 2:
After you have formed the bight, take the working end of the line and pull it up and over part of the standing loop. This creates a loop. Make the loop about six inches in diameter.
Notice the working end goes OVER the standing end.
Please go to step 3. |
|
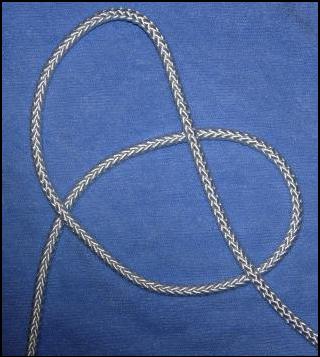
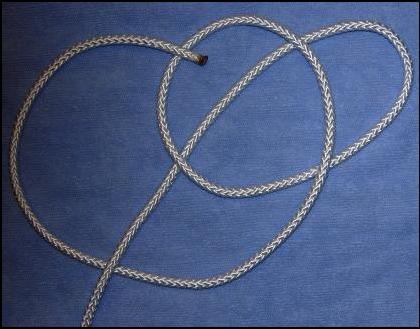
Step 3:
Now take the working end and bisect the loop you just formed. Keep going in a clock wise direction.
Please go to step 4. |
|
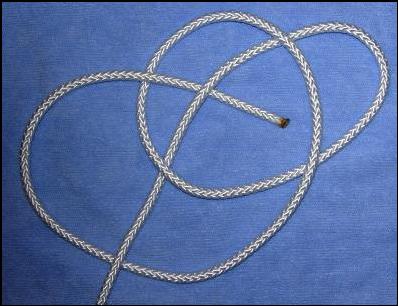
Step 4:
The Carrick Bend knots follow an over / under pattern. For the fourth step, take the working end and go UNDER the standing end.
Please go to step 5 |
|
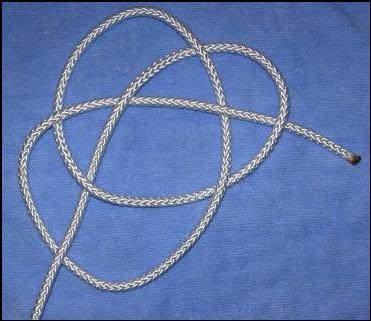
Step 5:
We will continue to use the over / under pattern. Thread the working end through the knot going over / under until you come out the other side.
We’re starting to thread the working end through the remainder of the knot.
Please notice that since we went under the standing end, we will go over the next line. (See photograph to the left.)
Please go to step 6. |
|
Step 6:
We will continue to use the over / under pattern. Keep threading the working end through the next part of the knot going under.
(See photograph at the right.)
Please go to step 7. |
|
Step 7:
Continue to use the over / under pattern. Thread the working end through the remainder of the knot going over / under until you come out the other side.
(See photograph to the left.) The line is "locked in" to the knot as it forms this part of the 3L4B Turk’s head.
This forms the Carrick Bend-on-the-bight knot which is also called the Sailor's Breastplate knot. The knot isn't very neat and tidy at this time but we will take care of that in our next step.
Please go to step 8. |
|
Step 8:
Straighten (fair up) the knot and make it more symmetrical. This will help you continue on the steps to make the 3L4B Turk's-Head.
This is a much more symmetrical Carrick Bend-on-the-bight knot.
Fairing up this part of the knot prepares you for finishing the 3L4B Turk’s Head.
The knot should form this shape at this point in tying the knot. If it doesn’t, please go over the steps above again. Notice the over / under pattern.
If you can tie the Carrick Bend-on-the-bight, you can tie a 3L4B Turk’s Head knot very easily. |
|
Tying the 3L4B Turk’s Head knot is continued on page two. Please click on the button below to continue. |