|
More Than Knots |
|
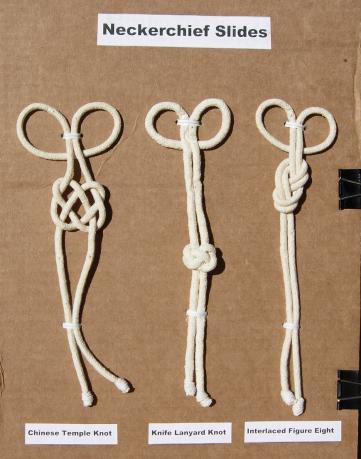
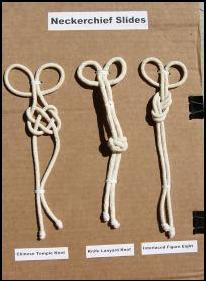
Temporary Knot Boards |
|
I do a lot of work with scouts and 4-H. Sometimes I’m asked to do a presentation on specific knots. I’ve found it best to have a display that will help teach the knot or knots.
Since I need to put these displays together in a hurry, I will make a “temporary” knot board. On a temporary board I can move the knot parts around to show how to make a knot (if they aren’t clear) or add additional parts to make the demonstration. If I am displaying knots, I can lay them out quickly.
Some of these “temporary” knot boards have been in use for years. |
|
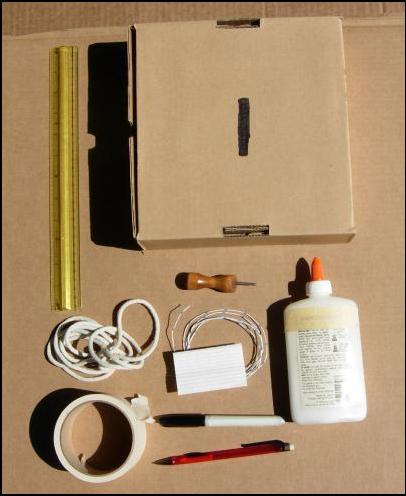
Items Needed |
|
cordage or the “preserved” knots (See other page on this website.) cardboard box. light wire or trash bag ties marking pen masking tape pencil punch ruler utility knife to cut the cardboard box white glue |
|
Before I cut the cardboard to make the temporary board, I lay out the parts of the knot. I break each part of the knot into sections or stages, laying out the sections.
The way to tie the knot may be obvious to me, but it may not be obvious to a person tying it for the first time. So it is important to break down the knot into as many sections as you need for teaching.
If I’m just displaying knots, I’ll lay them out in a pattern that looks the best.
|
|
Step 1: |
|
Step 2: |
|
Step 3: |
|
Once the knots or the knot parts are laid out, cut a piece of cardboard large enough for the display.
Make sure to make a square cut with the cardboard.
This is a good time to put the Title on the board using the marking pen.
Leave enough room to add labels with the marking pens. |
|
Step 4: |
|
Step 5: |
|
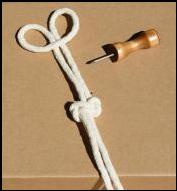
Using the punch, punch holes around the knots or knot parts.
Using the waste bag ties or light wire, tie the knots to the board.
Label the knots or knot parts as you go along. You will be less likely to mis-label a knot or knot part.
You can also use a computer print out and print labels on plain paper. Cut out the names and using white glue, glue the labels to the cardboard. |
|
Step 6: |
|
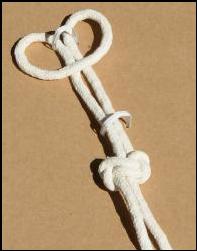
Once the knots or knot parts are tied on and labeled, flip the board over.
Using masking tape, tape the wire ties on the back of the board. They will be less likely to come undone or catch on something. |
|
If you haven’t already done so, go ahead and label the knots or knot parts using the marking pen.
You can also use a computer and print out labels on paper and paste it to the knot board using white glue.
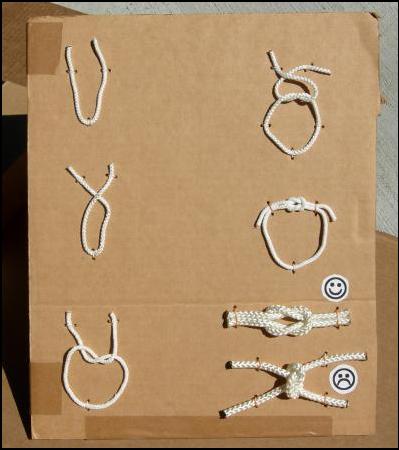
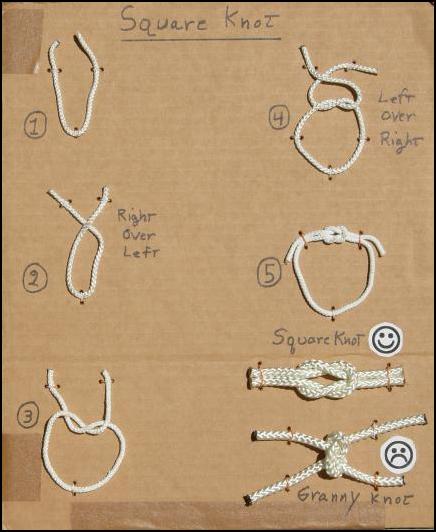
At the picture on the left, I’ve hand lettered the steps.
Since this board is used to teach five and six year old kids to tie the Square or Reef Knot, I’ve added a smiley face to let them know the correct way to tie the Square Knot. A frowny face was added to show them the Granny Knot is not a good knot. The smiley / frowny faces were printed on computer paper and pasted to the board.
During training, I’ve had kids glance at the board, determine they’ve tied a Granny Knot and have gone ahead and corrected themselves. No intervention was required by me. Likewise, they’ve determined they made the Square Knot and congratulated themselves on a job well done. |
|
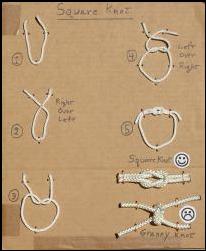
I’ve shown a temporary board on the right where I used a computer printout and have glued the labels to the board. I used spring clips on the right to hold the temporary board on a holding board. They work great too.
Now all that’s left is to go to your meeting and use the “temporary” board to teach or display your knots. |