|
More Than Knots |
|
Tying St. Mary’s Hitching |
|
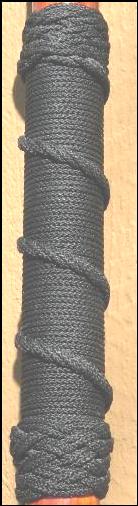
St. Mary’s hitching has a distinctive spiral that wraps around the cylindrical object. It looks nice on a walking staff. The pattern looks like you have wrapped a single cord around the cylindrical object when, in fact, you have hitched three strands to form the spiral. At the left is three stranded St. Mary’s hitching done in back nylon cord tied on a walking staff.
St. Mary’s hitching is fairly easy to tie. If spiraled to the right, you hitch the left strand to the right. Then bring the middle strand over the strand you have just hitched and also hitch it to the right. Then bring the last strand over the previous two strands and hitch it to the right. Continue this pattern until you have the area covered.
At first, it appears as if St. Mary’s hitching will make a nice handle. However you will find the raised cord very painfully cuts into your hand if used on a hammer handle. Is is best suited for occasional use on a tool where you hands may be slippery.
When tying with three stranded cordage, it is best to work with the lay of the cord. |
|
How to tie St. Mary’s hitching |
|
Three Stranded St. Mary’s hitching |
|
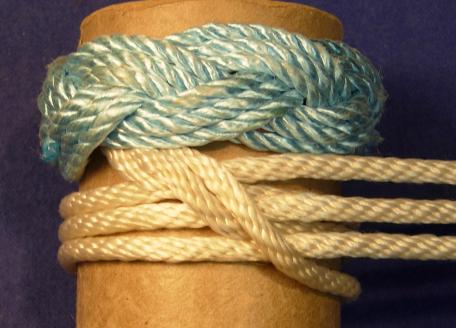
To start:
Firmly fix three strands to the cylindrical object upon which you would like to tie the St. Mary’s hitching. |
|
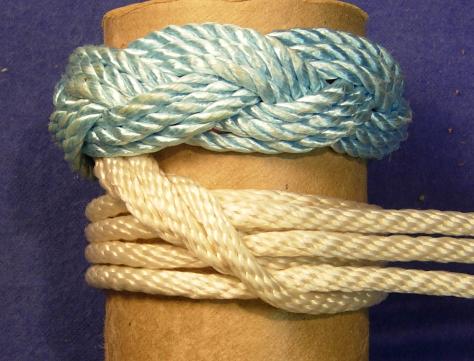
Step 2:
Take the middle strand bring it over the previous hitch.
Then hitch the middle strand to the right. This half hitch should lay beside the previous hitch.
Tighten up the previous hitch and straighten up the hitching. Move the cords together to make them align and look symmetrical. |
|
Step 1:
Move middle and right strand out of the way.
Take the left most strand and half hitch it to the right.
Keep the half hitch centered. |


|
Step 3:
After tightening up the previous hitch and straightening up the hitching, take the right strand and lay it over the previous two hitches. Lay it next to the previous hitch. This will align it for tying the half hitch.
Lay the two previous strands out of the way. |

|
Step 4:
After laying the third strand over the previous two strands, half hitch it to the right.
Ttighten all of the hitching and make sure all of the cordage is pushed together and symmetrical.
From here on out, we will take the top most strand, lay it over the two previous strands, and half hitch it to the right. |

|
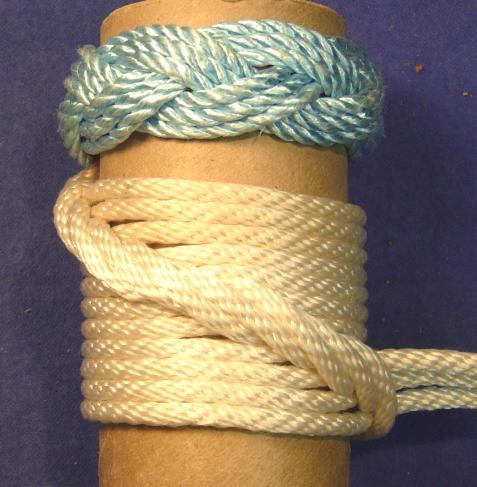
Step 5:
Half hitch the third strand to the right.
Tighten all of the hitching and make sure all of the cordage is pushed together and symmetrical.
Continue taking the top most strand, lay it over the two previous strands, and half hitch it to the right. |

|
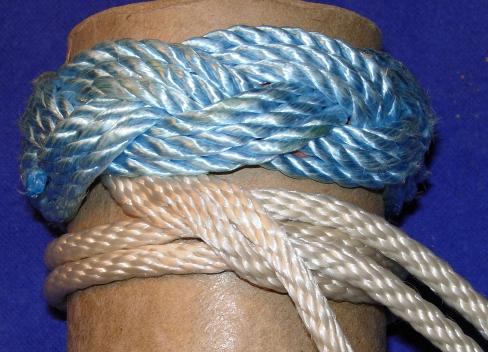
Step 6:
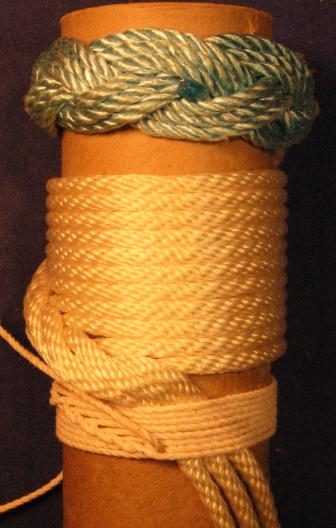
As you continue hitching, you will go around the cylinder. As you go, your previous hitching will form the spiral pattern.
Tighten all of the hitching and make sure all of the cordage is pushed together and symmetrical.
Once you have covered the area you wish to cover, you will need to finish the hitching. |

|
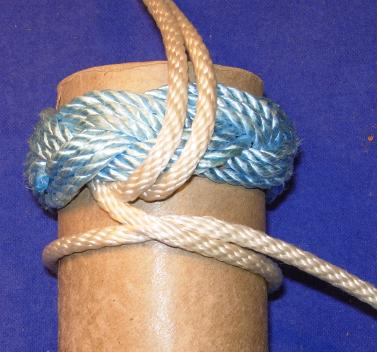
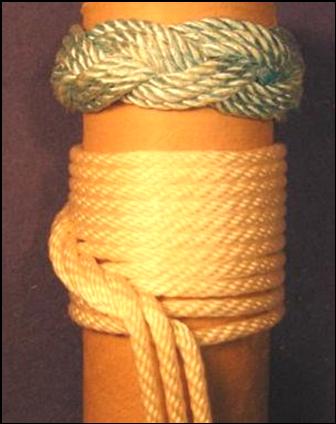
Step 7 - to finish:
Lay the three strands down the cylinder in a parallel row.
|

|
Step 8 - to finish:
Do Grapevine hitching (also called French hitching, Grapevine whipping, and French whipping) over the three strands.
Tighten all of the hitching and make everything symmetrical.
You may cover the Grapevine hitching with a Turk’s Head knot to further decorate the piece.
Congratulations on completing your St. Mary’s hitching! |