|
More Than Knots |
|
Tying Ring Bolt Hitching |
|
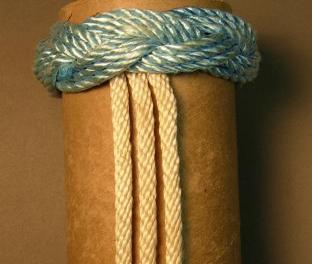
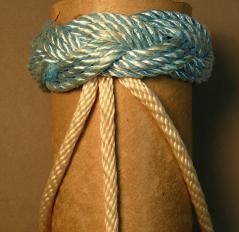
As shown on the left, Ring Bolt hitching has a distinctive left, right, left pattern. It looks neat on a walking staff and makes a fine handle.
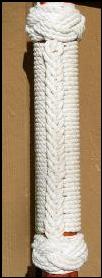
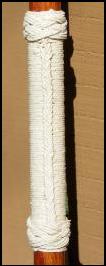
At the far left is three stranded Ring Bolt hitching. The pattern between the three and four stranded isn’t too much different and the method of tying is almost the same. The closer picture is four stranded Ring Bolt hitching. |
|
Three Stranded Ring Bolt hitching |
|
Four Stranded Ring Bolt hitching |
|
How to tie Ring Bolt hitching |
|
Start with three strands anchored tightly to the cylinder upon which you will tie the hitching. Lay the three strands vertically down the cylinder.
Since you are looking at this in reverse, I’ll refer to left and right sides as you see them in the picture. |
|
When tying Ring Bolt hitching with three stranded laid cordage it is necessary to tie with the lay of the cordage. In this example, I’m using a braided cordage so I can go either to the left or the right without worrying about the cordage. |
|
Pull the left and right strands and lay them off to the sides. We will hitch with them later.
Leave the middle strand as we are going to start with it first. |
|
Step 1: |
|
Step 2: |
|
Step 3: |
|
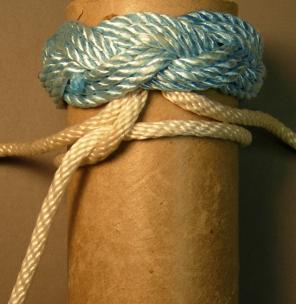
Take the middle stand and tie a half hitch it to the left. Tie the half hitch knot close to the middle of the cylinder. As you tie Ring Bolt hitching, you will want to keep the knots as close to the center as you can.
For now, just tie the hitch snugly but not tightly. When doing hitching it is best to tighten one strand after you have hitched another strand in front of it.
Since we started with the middle strand and hitched to the left, we’ll use the left strand next and hitch it to the right. |
|
Step 4: |
|
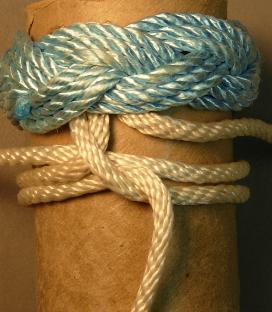
Half hitch the left strand to the right going over the first hitch you’ve already done.
Lay the half hitch knot next to the first half hitch knot. This will start the pattern you will see when the hitching is finished.
Tighten the first half hitch. This can be done now because the second half hitch is laying against the first and will keep the tension on the first knot.
Notice you now have one strand going to the left and another going to the right. This will become more important as we continue hitching.
Try to keep the half hitch knots as close to the center as possible. This will keep the pattern in a straight line and make the hitching look neater. |
|
Step 5: |
|
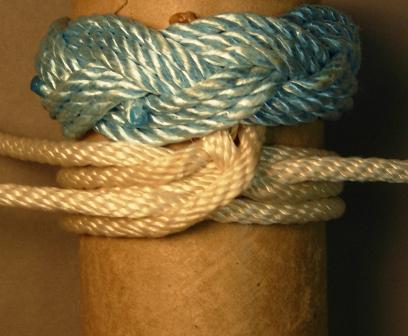
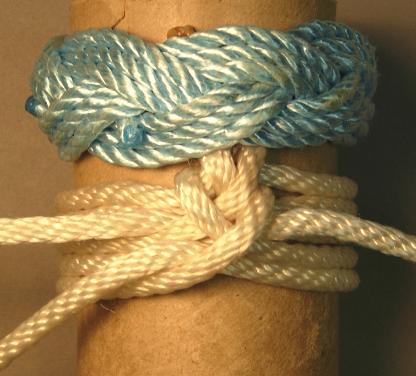
Now take the right strand and hitch it over the previous two hitches going to the left.
Tie the half hitch knot as close to the center and with the previous half hitch knots you tied earlier.
You can’t see the left, right, left pattern of Ring Bolt hitching yet, but it will soon pop out as you continue hitching.
Take this opportunity to tighten the previous half hitches.
Also notice you have two strands going to the left and one strand going to the right. Since we’ve gone to the left, the next half hitch will be to the right. |
|
Step 6: |

|
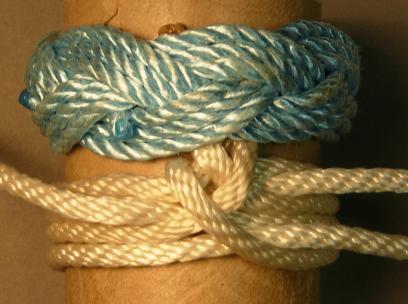
Take the upper left strand and hitch it over the strands you just completed. Since it is leading to the left, you will hitch it to the right.
Notice you now have two strands to the right and one strand to the left. From here on out you will take the strand from the side that has two strands and is highest on the picture.
Notice the pattern is starting to show.
You now have two strands going to the right and one strand going to the left. Your next hitching will be done with the upper right strand. |
|
Step 7: |
|
Take the upper right strand and hitch it to the left over the previous two strands.
You can see the pattern start to emerge as you continue hitching.
Notice you have two strands to the left and one strand to the right.
Take this opportunity to tighten all the hitching. You will also want to straighten all the lines. |
|
Step 3: Middle strand was half hitched to the left. |
|
Step 4: Left strand was half hitched to the right. |

|
Step 6: Upper Left strand will be hitched to the right. |


|
Step 7: Upper Right strand is hitched to the left. |


|
Step 8: |
|
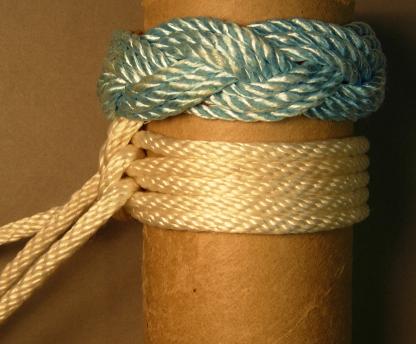
As seen in the picture at the left, take this opportunity to tighten the knots and straighten the lines.
This will “fair up” the hitching, make it tighter, and more like a handle.
After you’ve tightened the hitching, turn the cylinder back to the front and continue hitching. |
|
Step 9: |
|
Step 9: Upper Left strand will be hitched to the right. |
|
Step 8: Upper Left strand was hitched to the right. |

|
Take the upper left strand and hitch it to the right over the previous two strands.
You can see more of the emerge as you continue hitching.
Notice you have two strands to the right and one strand to the left.
Straighten and tighten all of the hitching. |
|
Step 10: |

|
Step 9: Upper Right strand will be hitched to the left. |


|
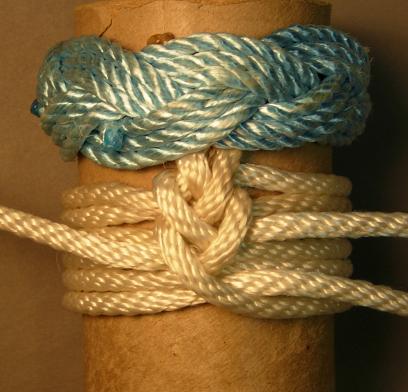
Take the upper right strand and hitch it to the left over the previous two strands.
You can see the Ring Bolt pattern clearly now.
From here on out you will continue the left, right, left pattern until the hitching is the length you want.
Once you have the length you want, secure the ends. I finish by covering the ends with Turk’s Head knots.
|
|
Step 5: Right strand was hitched to the left. |
|
Step 6: Upper Left strand was hitched to the right. |
|
Step 10: Upper Left strand will be hitched to the right. |
|
Step 8: Straighten and tighten all leads. |

|
Step 9: Upper Right strand was hitched to the left. |
